Firebase: Analytics in iOS
Firebase is a mobile and web application development platform that can bring to ours application different services and functionality, one of them is “Authentication”, providing insight into app usage and user engagement, which this will help us to understand how your users behave and with this enables to make better decisions regarding app marketing and performance optimizations.
So, now that we know what Firebase is, let’s learn how we can include it in our iOS applications
How can you start to use Firebase?
In the first place before we can use the Authentication service we need to include Firebase in our apps. To do that, follow these steps:
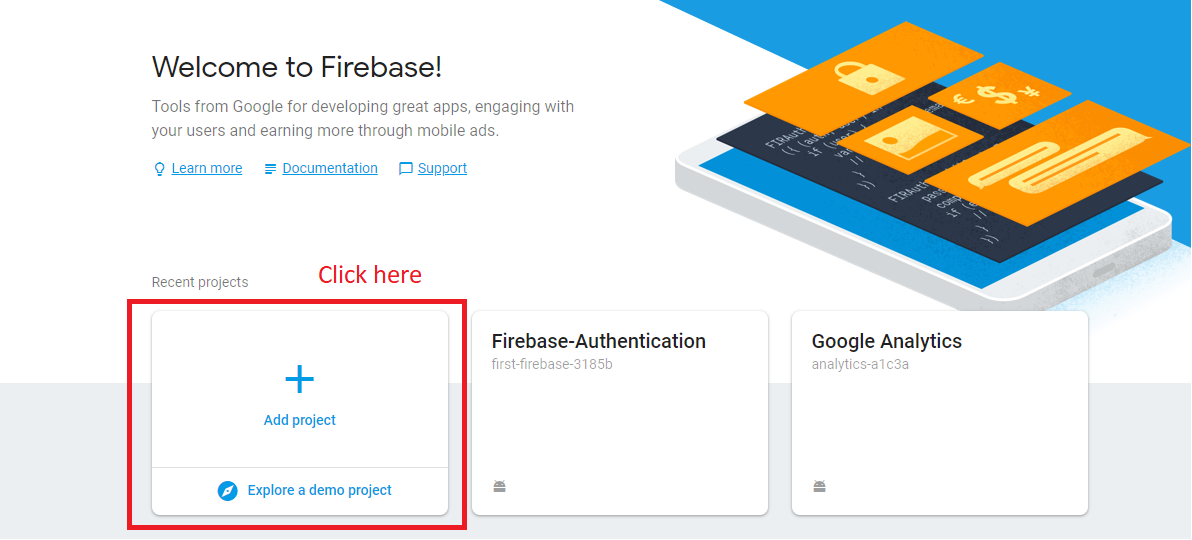
– First we need to get to the Firebase console and once we are there we click on “Add project”.
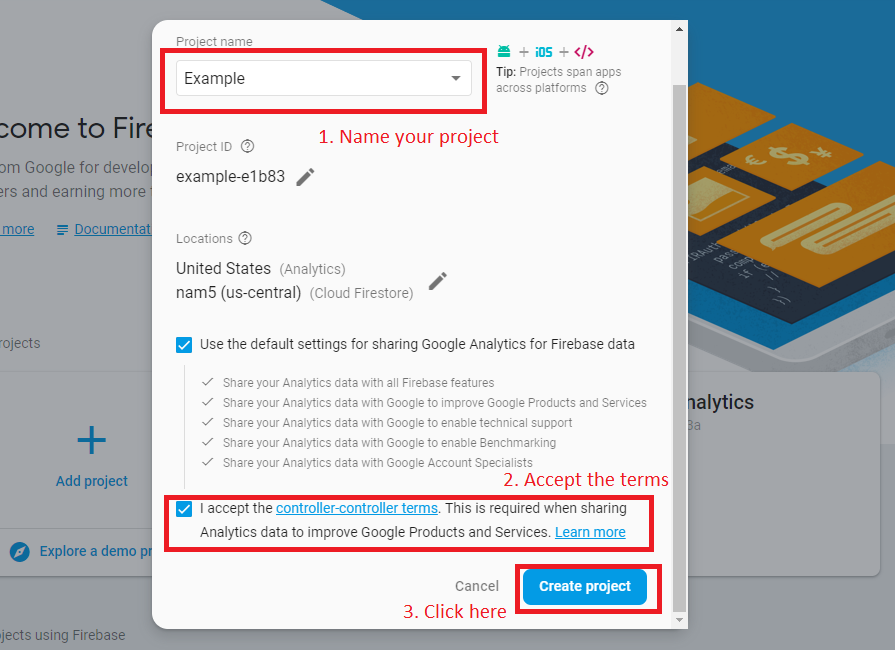
– Fill the following form to create your project.
– After that it will redirect you to your project’s overview page where we will specify the type of application we are creating. Because we are doing an iOS application you can select that option.
– After we click on it, it will give some steps to register our app. In the first will just need to some information about our application.
– For the next step, it will give us a “plist” file which you can download and add to your projects folder in your iOS application.
-The next thing is implement the Firebase object you will use in our app, to do that you have to create a “Podfile” using the terminal with the following line:(if you don’t have the CocadPods installed you can do it entering here)
pod init
–After that we open our “Podfile” (I used “vi”) and add the following lines to the document:
pod ‘Firebase/Core’
pod ‘Firebase/Analytics’ (This line is to add Analytics functionality implement Firebase to our app is not necessary for only Firebase)
-Exit from the file and use one last command:
pod install
-Now you can close the terminal and go to your project executing the “.xcworkspace” file created in your project’s folder.
Once you are back to your project go to the “AppDelagate” file and import and start the Firebase object:
After we add those lines to our Android project we will have FireBase setup and ready to be used in our app (The last step on the page is to verify that the app is connected to the Firebase console).
How to register events
– If you can watch at your Firebase console in the Analytics tab, “Dashboard” section you already have Analytics implemented, registering the user that used your app and reporting some events of your app, this event can help the creator to know how his or her app is being used like, for example, help the creator to know how many times does a button in our app got clicked, so I am going to show how to create your own events to receive the report of it.
– To do that you need to implement the class firebase in our ViewController, then use the Analytics object and use the “logEvent()” function. Next you have to give to the event an Id and some parameters, so the information that is going to give here you have an example
Doing this, you will have the possibility to log any action that it took place on your app, to see the report you just have to go the console and the Analytics tab, go to the events section and check if your event has been triggered ( it might take a while to show up).
Now you know the basics of Firebase Analytics on iOS, in the case that you want to know more about this functionality checkout the official Firebase website and there you can learn all about this amazing tool.
Terminal
Open File: vi Podfile
User cursor to go to end section
Access to insert: Press i
Add pods
pod ‘Firebase/Core’
pod ‘Firebase/Analytics’
Press Escape to get out of insert
Press Colon and x to save the changes


